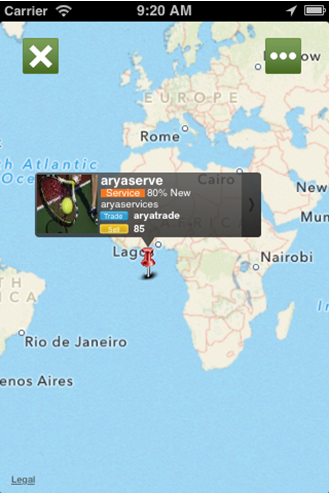
We use Maps to find places and directions. The MapKit framework makes it easy for developers to create custom annotation view to implement applications which can make use of the maps in the applications. To create a custom annotation view over map view using Mapkit framework just follow these simple steps.
Step 1- While adding annotation don’t give its title and subtitle. Just add it with Latitude / Longitude and take an integer variable that starts with 100(so that its tag do not clash with others) and increases as per the loop for adding notation.
annotationTag = 100;
annotationPoint.coordinate = loc;
[mapViewHuanBao addAnnotation:annotationPoint];
annotationTag++;
} Step 2- When you add a notation this will call an MKMapViewDelegate function, just set a tag of that notation.
In indexOfTheObject you will get the notation tag.
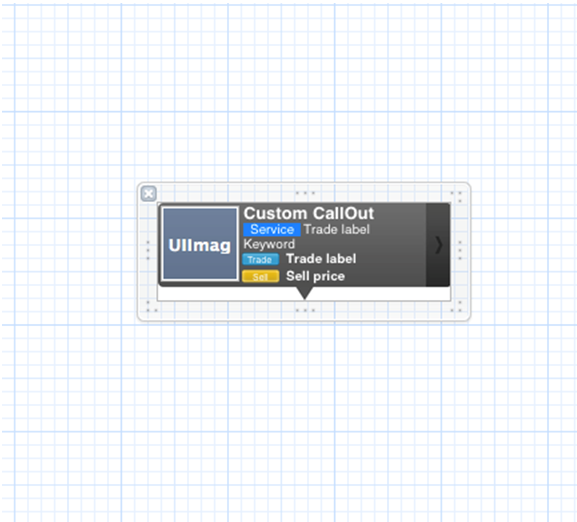
Step 4- Now create a custom view as per your requirement, and give tag to every property you used in that view. We used callout view name as calloutView. Set its file owner to your view controller.
Step 5- After finding the tag of selected notation, just use following method to create a custom call out view.
UILabel *nameLbl = (UILabel *)[annotationView2 viewWithTag:[here give ur tag which u set in custom view]];
And so on….
Step 6-Finally just add it to the view.
[view addSubview:annotationView2];
You can also navigate it to its detail but for that you have to add it on map view, because when you are adding it on view it will remove it from view, so the object is DE allocated.
The rapid growth of digital payments has transformed how businesses and consumers manage financial transactions. Whether you’re ordering food, shopping online, paying utility bills, or transferring money internationally, secure digital […]
Artificial Intelligence has evolved from a futuristic concept into a powerful business tool. In 2026, organisations across industries are leveraging AI to automate workflows, enhance customer experiences, improve decision-making, and […]
If you run an online store—or plan to start one—you already know the truth: everyone is on their phone. In 2026, if your business isn’t on a mobile screen, it’s […]