Google March 2026 Core Update: What SEOs Need to Know Now
Google’s March 2026 core update is rolling out now, and the SEO industry is once again in watch-and-wait mode. Whenever Google pushes a broad core update, rankings can shift quickly, […]
If you’re setting up the Google Ads Account for the first time, it can be a grueling task to know how to get your account set up properly, so we are here with a guide for you.
This guide is designed to not only walk you through setup but ensure you have the necessary assets in place to run successful campaigns. Once your Gmail Account is established following this, step-by-step guide, you will be up and running in just a few hours:
First, create a Google Ads account. Visit ads.google.com and click “Start now”. Once you’re signed in you will navigate through a screen asking for your main advertising goal. At the bottom of this screen, you will see a link that says “Switch to Expert Mode”. Click that, and then we’ll get started with setting up your first campaign.

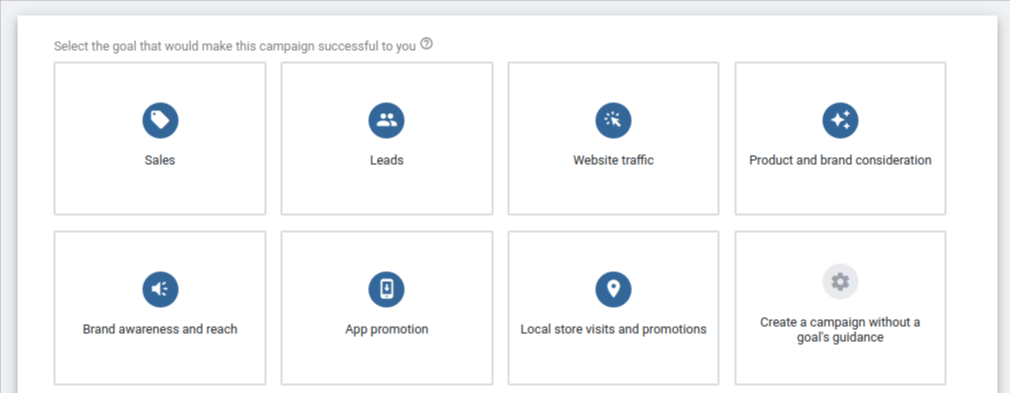
Campaign Goals– Now you’ve switched over to Expert Mode, you’ll see that you can begin setting up your campaign with a variety of goal-based options.
Your options are: Sales, Leads, Website Traffic, Product and Brand Consideration, Brand Awareness and Reach App promotion; or you can choose to create a campaign without a goal’s guidance.
Though your goals are likely to align with one of the options above, we recommend you to create your campaign without goal guidance. Again, the idea is to maintain control over your campaign and not allow Google to make decisions for you.
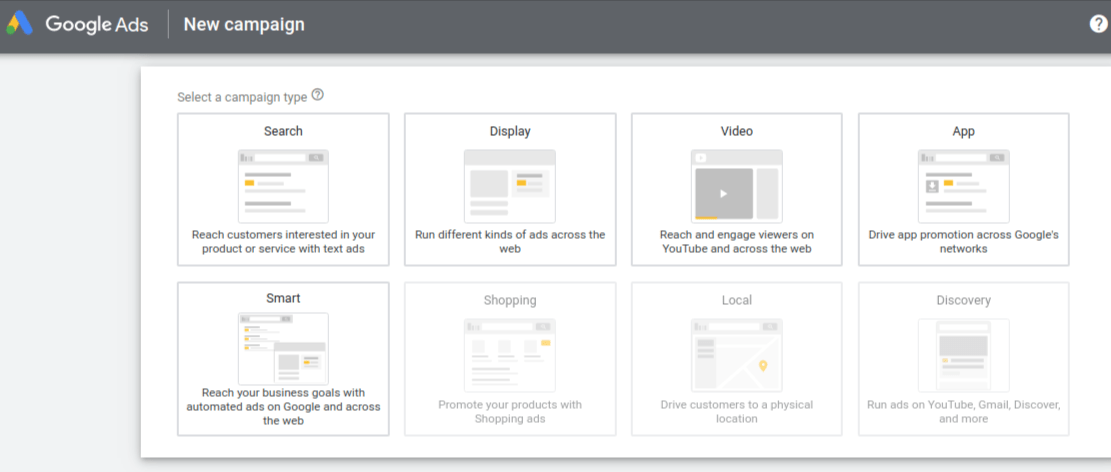
Campaign Types- The next step is to choose the type of campaign you would like to create.
You have the choice between six different campaign types: Search, Display, Shopping, Video, App, and Smart campaigns. There are two additional options, Shopping, and Discovery, but these campaign types will be unavailable if you’ve just created your account.
Search – Search campaigns are used to show text ads on Google’s search result pages. These ads are triggered by search queries (the words a user types into the search prompt). You will be able to target these search queries by choosing keywords related to your product or service.
Display – Google has access to a network of more than 2 million websites (and counting) where they can place text, video, and image ads. There is a variety of targeting options with Display campaigns including keywords, audiences, placements, and more. Display campaigns are great for increasing brand awareness or re-engaging past website visitors as they browse the internet.
Video – YouTube is now the world’s second most popular search engine, behind Google. And guess what? Google owns YouTube. Yep, it’s a monopoly! From your Google Ads account, you can create video advertising campaigns to show your videos on YouTube. Again there is a variety of targeting options here, similar to those mentioned with Display.
App – If it’s an app you’re looking to promote with Google Ads, app campaigns are your best (and only) options. With App campaigns, you will be able to advertise your app on many Google properties, including Search, YouTube, the Display Network, and the Google Play store. These campaigns are fully automated, so once you’re set up just sit back and watch the installs and upsells roll in.
Smart – Remember that control we were talking about maintaining earlier? Smart campaigns don’t allow for much of that. Essentially you are giving Google some basic parameters to work within and letting the AI take it from there. When used in the right way Smart campaigns can add some value to your account, but they are definitely not the place to start.
For this guide, we will be focusing on how to set up a Search campaign only. And if you’re new to PPC advertising, Search is almost always the best place to start.
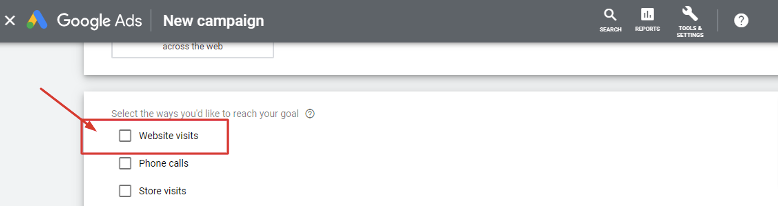
Before we move on to the next phase of the campaign creation process, you have choices to make. Google will ask you to select the results you want to get from your campaign. Your options are website visits, phone calls, and app downloads. And now we’re ready to get into the nitty-gritty details of a Search campaign build-out.
Campaign settings are broken into 3 sections: General Settings, Targeting and Audiences, Budget and Bidding, and Ad Extensions. We are going to walk through each section, highlight your options, and help steer you in the right direction on which choices to make.
General Settings- In this section, you will first give your campaign a name. Next, you will need to choose which network you want your ads to appear on. Your options are Search and Display. And since we are only interested in setting up a Search campaign right now, we are going to make sure we keep the Search box checked and deselect the Display box.
Note: There is a “show more settings” link below the Networks section. You can ignore these options for now.
Targeting and Audiences-Now we’ll move on to honing in on your targeting options so that we can make sure your ads are shown to the right people.
Locations- First, you will select the geographic locations where you would like your ads to show. Your targeting can be as broad as the entire world or as specific as a single zip code. Your options by default are All countries and territories, United States and Canada, United States, and Enter another location. To target locations at the city, state, zip code, or radius level, select the “Enter another location” option and then click on Advanced Search. From there you will be able to choose your specific target locations.
Once you’ve chosen your locations, you’ve got one more very important setting to enable in this section. Click on the Location options link and you will be presented with the choice to target:
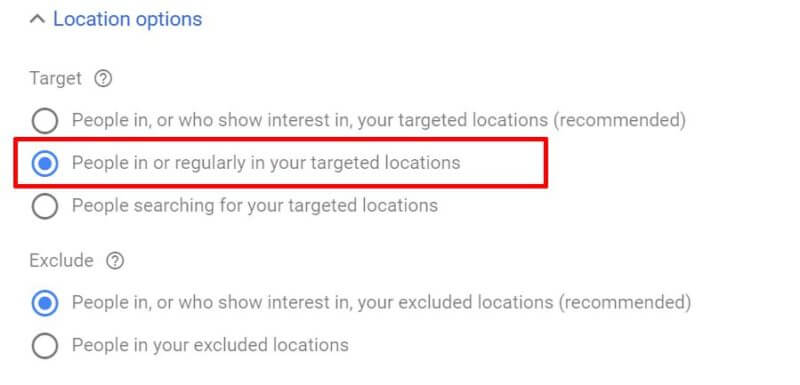
We highly recommend selecting option #2: People in or regularly in your targeted locations. Despite the fact this is not the default option recommended by Google, it is generally the right choice for 99% of all campaigns. By selecting this option you are ensuring that your ads will only show to people who are physically in the locations you are targeting.
With the other two options, your ads can show anywhere in the world, as long as the person searching has shown an interest in your targeted locations. For example, if you are a local business targeting the State of New York and you have selected options 1 or 3, your ad could show to someone in another country who has recently researched flights to New York for a vacation or business trip. This is not what you want unless you are in the travel or tourism business of course!
Under Exclude, you can leave the recommended default option selected, which is “People in your excluded locations”.
Languages- This one is self-explanatory. Select the language or languages your customers speak. Google will limit your ads to be shown only to people who speak the languages you’ve chosen. Just make sure that your ad copy matches your chosen languages here and you’re all set.
Audiences- You will have the option to add audiences to your campaign. Audiences can be added at either the observation or targeting level. This is an advanced option and not something you need to explore just yet, especially if you are setting up your very first Search campaign. So we’re going to leave that section as is for now and move on.
Budget– The Budget setting is fairly straightforward. Here you will set the amount of money you want your campaign to spend each day. A good starting place for setting your daily budget is to determine how much you want to invest in your campaign per month.
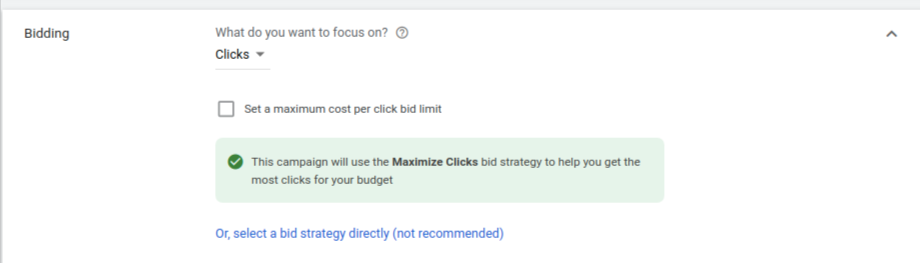
Bidding- The Bidding section is where you set the bidding strategy for your campaign. Google will try to help you choose a bidding strategy by asking what type of result you want to focus on. The default recommended choices are: Conversions, Conversion value, Clicks, and Impression share.
You may be thinking…I want to focus on Conversions of course! And that should absolutely be your focus. However, selecting one of these default options will lead to Google assigning you an automated bid strategy. Automated bid strategies allow Google to set your bids for you automatically. And while automated strategies have their merits in some cases, they are not the optimal choice for most advertisers to start with. Instead, I recommend that you select your bid strategy directly rather than having Google choose.
To do that, click the link that says “select a bid strategy directly”.
Now you will see a menu where you can select from a long list of bidding strategies. At the top of the list, you will see Google’s many automated bid strategies, which include:
Beneath all of those options, at the very end of the list, you will see Manual CPC. Bingo! This is the option you want to choose, as it gives you full control over how much you spend per click for each keyword in your campaign. Google doesn’t like this and they will show you a warning that a Manual CPC strategy may result in lower performance. Fear not, you’ve made the right choice.
Now, that you’ve chosen your bid strategy, click on the show more settings link below the bidding section. This will reveal a few more settings that you will want to address before moving on.
You can ignore conversions for now, but you will definitely want to set up conversion prior to launching your campaigns.
Ad Schedule- Your ad schedule is where you will set the days and times you want your ads to be eligible to show. This can vary for each business based on budget, products, and services offered, and business operating hours. Once you’ve set your ad schedule you can leave ad rotation on the default setting (for now) and move on to the next section.
Ad Extensions- The final section of the campaign settings screen is Ad Extensions. You will definitely want to set up all three of the primary extension types listed below.
Sitelink Extensions – By using Sitelinks you can show up to 4 additional links with your ads. These links can be used to send customers to different pages on your website that may be helpful in educating them about your business and offerings.
Callout Extensions – Use Callout Extensions to highlight things like competitive advantages, discounts, and promotions.
Call Extensions – If your business generates leads or sales by phone, adding a Call Extension is essential. This enables your phone number to show with your ads, and for mobile users gives them the ability to call you directly from the ad without navigating to your website.
The next step in setting up your Google Ads campaign is to create ad groups. Ad groups are sets of related keywords that share one or more ads. When choosing what keywords to use, first start with your core product or services. I recommend creating just one ad group here and then building out the rest of your campaign using Google’s Keyword Planner tool. The Keyword Planner makes it much easier and faster for you to research your keywords and organize them into ad groups.
Now that you have set up your first ad group, you will need to write an ad for it. Let’s walk through each element of an ad and go over some best practices to get you started.
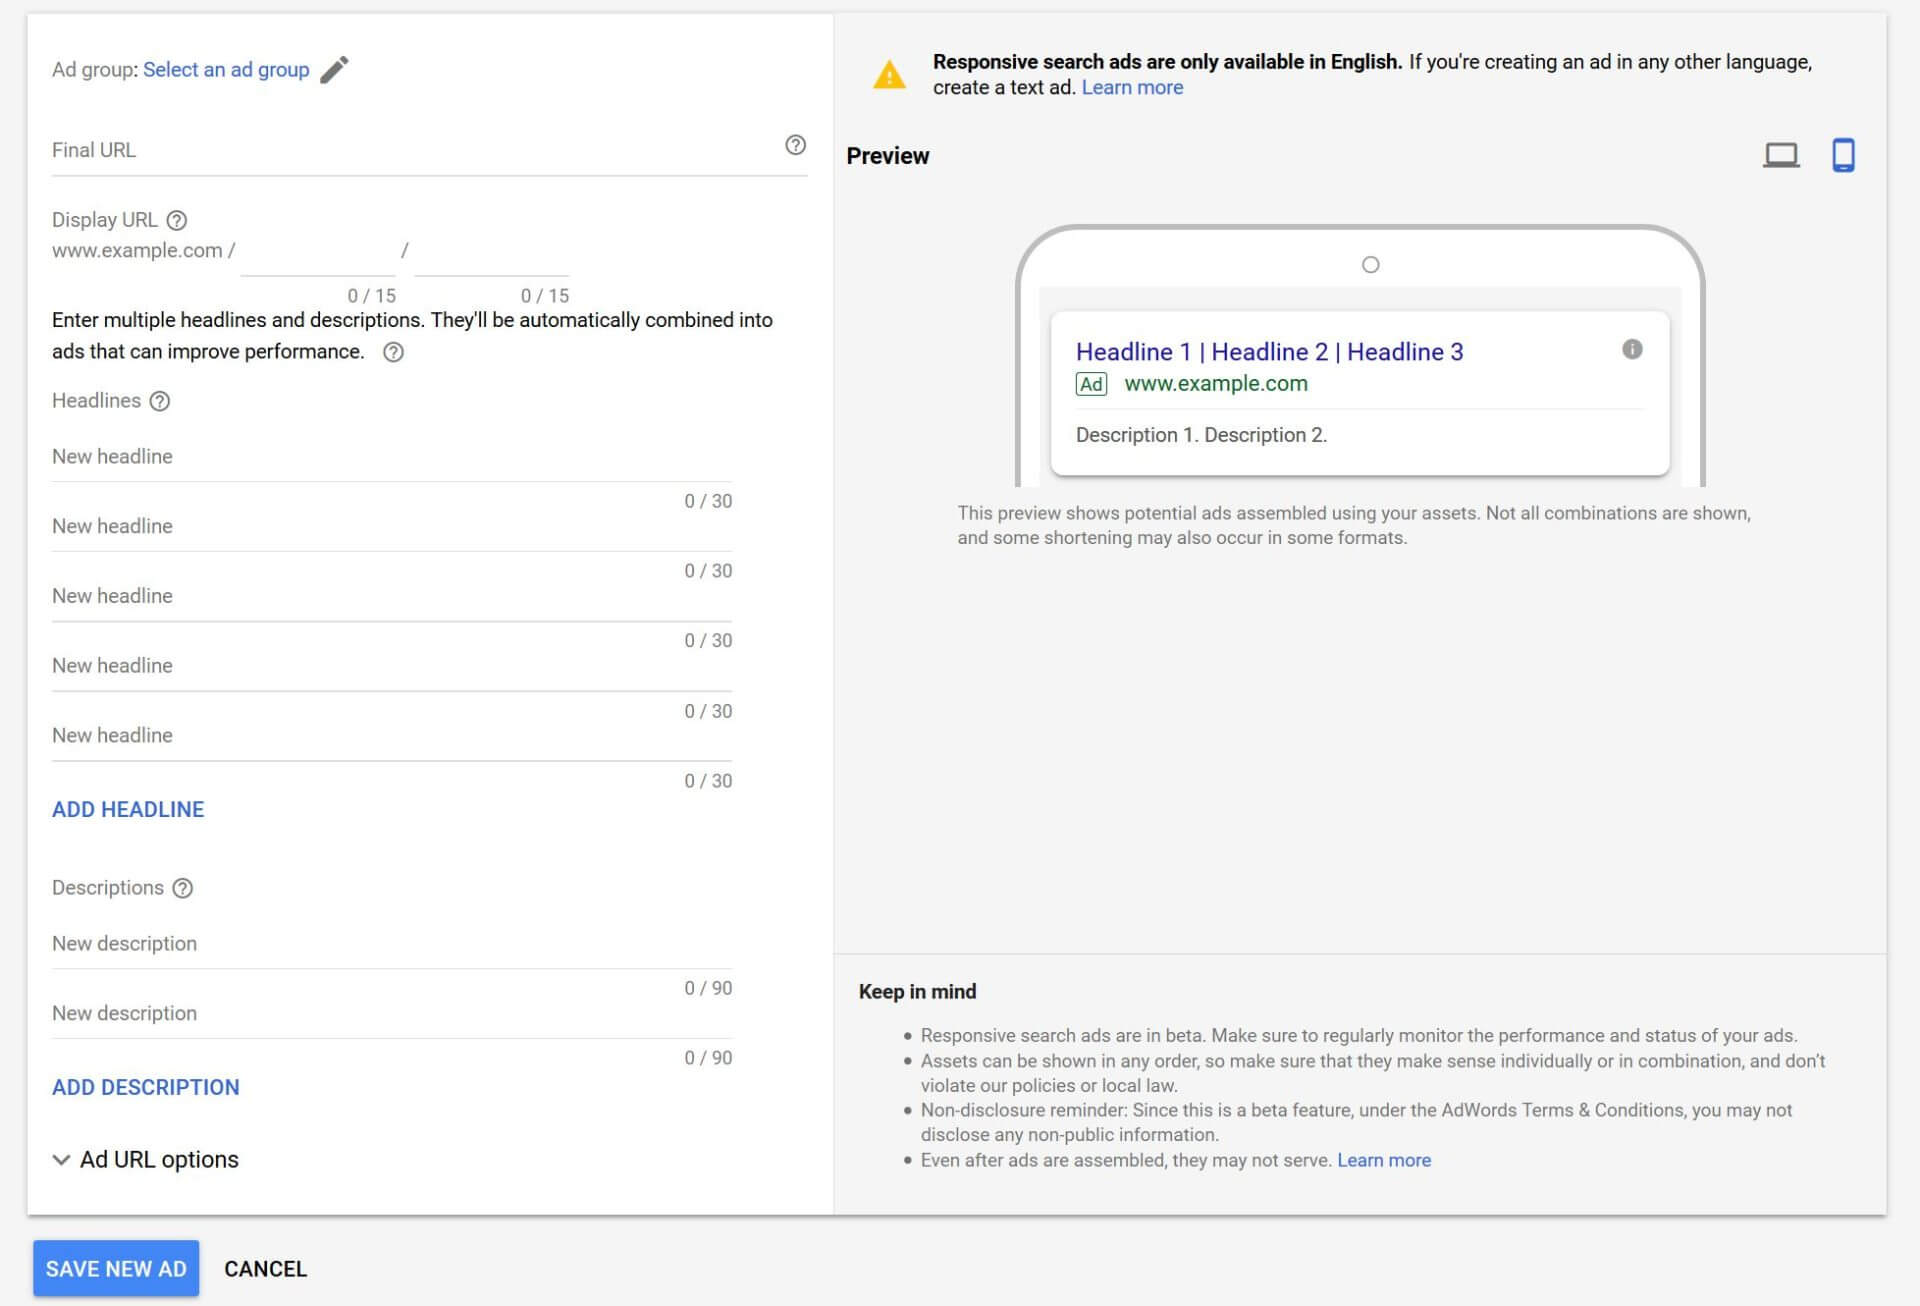
Final URL – The Final URL is the page on your website that your ad will link to. The content of this page should match the product or service your ad is promoting. If you don’t have a page or landing page on your site that closely matches what you are promoting, your homepage is the next best option.
Headlines – Google allows you to show up to three headlines with your ad. You want to take advantage of all three. Each headline allows for only 30 characters, so you’ll have to be creative and concise about communicating your message. Your headlines should address the product or service you are promoting and include a call to action (what you want the customer to do once they get to your website) at the very least.
Display Path – The display path is part of the URL that is actually shown with your ad. This path does not have to match the Final URL. Use this field to give customers an idea of what page they will reach when they click on your ad. Using your keyword here (or the product or service you are promoting) is a good practice.
Descriptions – You have the ability to add up to two descriptions of 90 characters each. Here you can really go into more depth about your offering and your business.
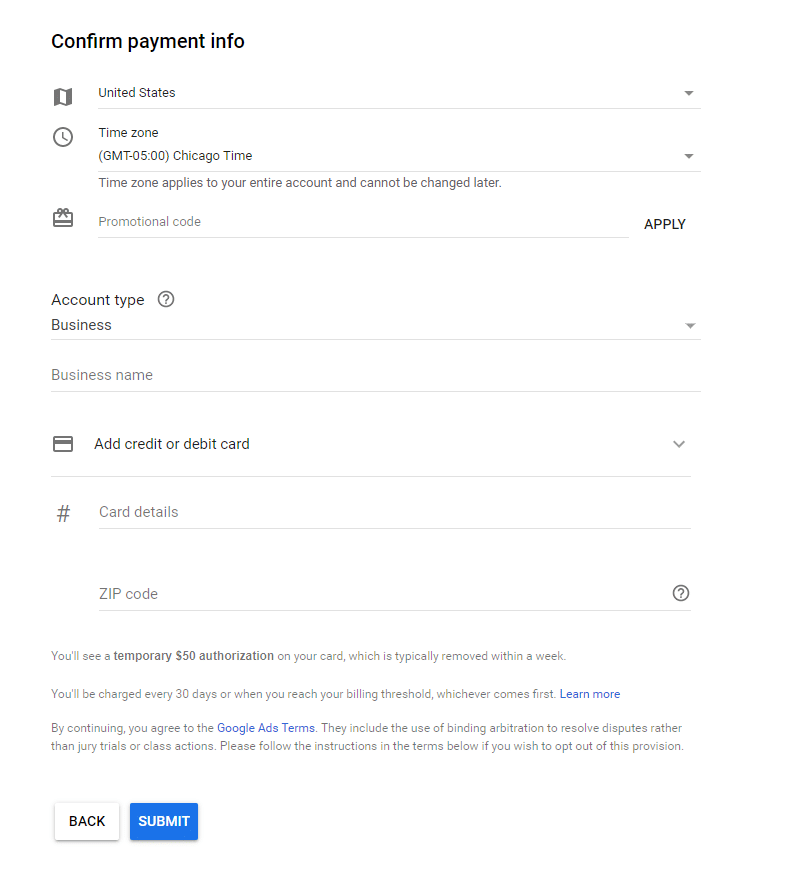
The last step in creating your new account and the first campaign is to enter your billing information. This process is pretty straightforward. Google gives you the option to fund your account with either a credit or debit card or a bank account. If you have a promotion code from Google, you can enter that here too!
What are the billing options?
When you are setting up your payment options for Google ads, there are two things you need to keep in mind. Your payment settings and your payment method. Generally, your country and the currency you are paying in determine both the payment method and payment settings available to you. However, in some cases, a payment method or setting usually available for your country or currency can be temporarily unavailable for your account.
Let’s take a look at the available payment settings:
Automatic Payments: With automatic payments, you are charged after your ads have run either 30 days after your last automatic charge, or when you reach a threshold amount, whichever comes first. You can also make payments at any time to control your costs. You should note that Google no longer accepts prepaid cards for automatic payments.
Manual Payments: Manual payment means that you pay when you want for future costs. That is, you make a payment to Google before your ads run. Then as your ads run, the cost is deducted from the payment you made, and when the payment is used up, your ad stops running.
What are the available payment methods?
With this payment method, Google will deduct payment for your ad from your bank account. If you are using the automatic payment setting, your bank account will be charged after accrued ad costs. You’ll be charged 30 days after your last automatic payment, or when your ad costs hit a preset amount (known as your billing threshold), or whichever comes first. If you are using manual payments, you have to manually initiate a payment; then Google will charge your bank account.
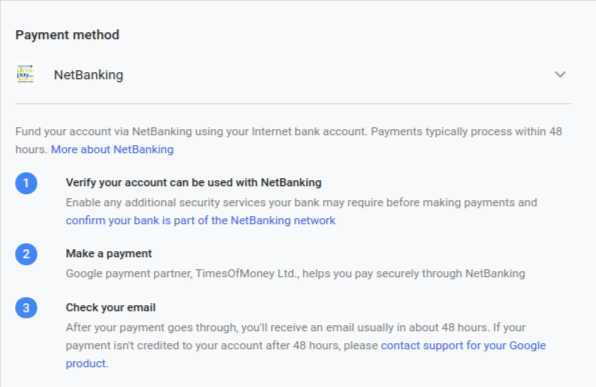
Here is how to set up a direct debit on your Google ads account:
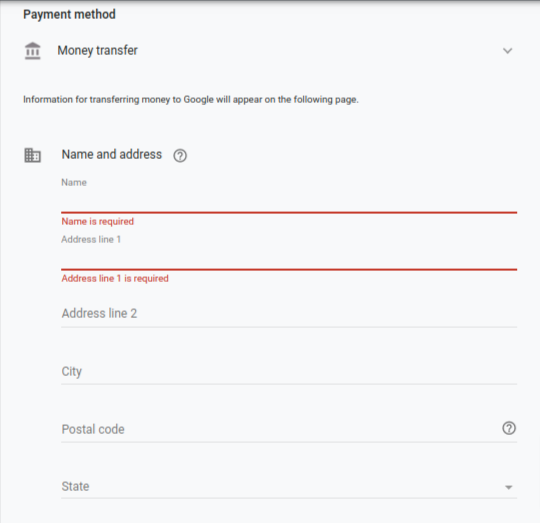
Money transfer is a way to add money to your Google Ads account by transferring money to Google. See the instructions below on how to set up and make a money transfer, what to expect, and what you can do if your transfer is taking too long.
Google accepts certain types of credit cards and debit cards with the Visa or MasterCard logo. You can use credit or debit cards for both automatic and manual payment settings.
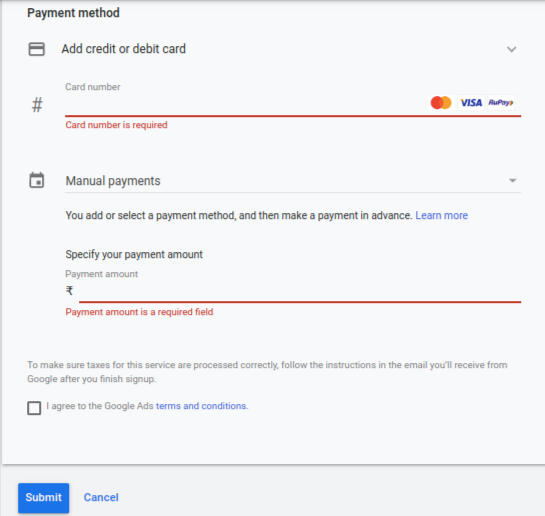
How to add a credit or debit card to your Google ad account:
Congratulations, you have successfully set up your first Google Ads campaign! By following this guide you have set yourself up with a strong foundation from which to fully build out your campaign. Now go forth and start growing your business with the most powerful advertising tool on the planet!
Congratulations, you have successfully set up your first Google Ads campaign! By following this guide you have set yourself up with a strong foundation from which to fully build out your campaign. Now go forth and start growing your business with the most powerful advertising tool on the planet!
Mar 31st, 2026
Google’s March 2026 core update is rolling out now, and the SEO industry is once again in watch-and-wait mode. Whenever Google pushes a broad core update, rankings can shift quickly, […]
Jul 29th, 2025
For decades, Google has been the go-to search engine for users worldwide. Its algorithms are powerful, its speed is unmatched, and it integrates seamlessly into our digital lives. But in […]
Apr 10th, 2025
Have you ever wished that running Google Ads could be simpler, smarter, and more effective—all at the same time? If yes, then Google’s latest innovation might be exactly what you’ve […]